Pinterest

Follow Me on Pinterest

Saturday, December 18, 2010

12 Days of DIY :: Day 5 :: Victorian Holiday Wreath Centerpiece

This DIY project found on Elizabeth Ann Designs is great for everyone from beginner to expert. The centerpiece can be a wonderful addition to your dining room table at home, or several can be made for holiday party or wedding centerpieces. For such few supplies, the finished product is absolutely gorgeous!


Supplies needed (for basic centerpiece – see printable version for each skill level):
  • (3) varying height (but same diameter) cylinders (Crate and Barrel sells the perfect ones for about $10 for all 3 pieces)
  • 12” grapevine wreath
  • 12” charger plate
  • (1-2) bags of fresh cranberries
  • (3) Floating candles (make sure they are smaller diameter than your vases)
  • (1-2) boxes of assorted glass ornaments
  • Kiwi branches
  • Water


 Directions (for basic centerpiece – see printable version for each skill level):
  1. To give your wreath more texture and dimension, add some kiwi branches by weaving them into the grapevine
  2. Center the wreath on top of the charger plate
  3. Place the 3 cylinder vases in the center of the wreath on the charger plate
  4. Fill the vases with 1-2 handfuls of fresh cranberries
  5. Fill the vases with water leaving 1.5-2 inches of space from the top
  6. Add your floating candles on top of the cranberries (if you added too much water, remove it with a turkey baster—do not get the candlewick wet or it will not light!)
  7. Fill the gaps around the vases the middle of the wreath with assorted glass holiday ornaments


For printable step-by-step instructions and images (including a basic, upgraded, and advanced version for all skill levels!), click here.

Friday, December 17, 2010

12 Days of DIY :: Day 4 :: "Believe" Banner

I love hanging banners for the holidays! This "Believe" banner is easy to put together and perfect to hang on any wall, mantle or even a high doorway. I found templates and instructions on the At Second Street blog. (Links are below the photos)...


Click here for the printable letter templates
Click here for instructions on hanging the banner

Thursday, December 16, 2010

Fox 8 Hot List Winner

It was announced today that Amy Nixon Events won 1st place in this year's Cleveland Fox 8 Hot List! Thank you to everyone who supported us by voting! Clients, vendors, businesses and friends all stepped up for us in this year's contest, and we're so appreciative of the support and love! Congratulations to all the other winners and nominees!


12 Days of DIY :: Day 3 :: Hot Cocoa Ornament Favors

This hot cocoa ornament DIY project is a great idea for holiday parties or weddings. You can give them as favors to your guests, and they double as decor as well! Or, you can put them on your tree at home and ask friends to take one home when they visit you. Either way, this DIY project from Project Wedding is too cute to pass up!


12 Days of DIY :: Day 2 :: Balsa Wood Mini Tree

This DIY project is perfect for those in apartments (or other small spaces) where bringing in a full size Christmas tree just doesn't work. I know I've lived in a few apartments in my day that I lovingly refer to as "shoeboxes", and I was always a little down at Christmas because I couldn't have a tree. This neat little project from Design*Sponge is the DIY solution to that problem!


Materials:
  • 4 – 6 sheets of  1/32″ x 3″ x 36″ balsa wood (this should be available at craft, art, and hobby shops)
  • pencil
  • exacto/utility knife with sharp blade
  • cutting mat
  • hot glue gun and hot glue sticks
  • 3/8″ thick dowel 20″ long
  • hole punch tool (these are available at craft and art supply stores)
  • hammer
  • ruler
  • birch log slice (or any wood circle or block that has a bit of weight and a flat surface)
  • 2″ nail
  • drill with 3/8″ boring bit (optional)
  • tree limb templates (feel free to enlarge for a bigger tree. at 100% these templates will make a tree 11″ wide and about 20″ tall)
  • template 1
  • template 2
  • template 3


Get the full instructions and more photos at Design*Sponge

Tuesday, December 14, 2010

12 Days of DIY :: Day 1 :: Gift Card Snow Globe

Today begins our 12 Days of Christmas DIY series! Last year we did a DIY project every day for 12 days leading up to Christmas, and it was loads of fun! This year we decided to take on the 12 day project again!

Our first project we found on One Charming Party....it's so easy, yet so creative! I never want to give gift cards for Christmas (even though they're a fabulous idea) just because they're so small and un-wrappable....and when you hand over the envelope, everyone knows what's inside! With this cool snow globe project you can wrap the globe in a box, hand over the wrapped gift, and they will be none the wiser! Not to mention, you can jazz them up with personality and they're really beautiful!


Supplies: 
A jar with a lid (we used empty salsa and olive jars), a gift card, a small embellishment (we bought ours at a local craft store), a hot glue gun, glitter, some ribbon and water.

How To:
1. Wash the lid and jar. Remove any stickers.
2. Spray paint the jar lid if you would like a different colored lid.
3. Glue a thick line of hot glue onto the base of the gift card. Stick it to the inside of the lid.
4. Glue the embellishment onto the inside of the lid, in front of the gift card. Let the glue set for an hour.
5. Add some glitter to the jar and fill with water.
6. Tightly screw the lid back onto the jar.
7. Tie a ribbon around the base of the jar, if desired.

NOTE: *We tested these gift cards after a week and they still worked. However, we don’t recommend leaving the gift cards in the water longer than a week.

Visit One Charming Party for the full post and photo credits.

Monday, December 13, 2010

Winter Wedding Dresses

Since it's a snowy mess outside, I'm really feeling in the spirit of winter these days! I've been having fun looking through all of the winter style bridal gowns! I love the feathers, fur, and "fluff" of a winter wedding dress. Here are a few of my favorites....


Saturday, December 11, 2010

DIY :: Candy Cane Cake Pops

I just made a yummy batch of chocolate cupcakes this week, topped with cream cheese peppermint frosting and sprinkled with crushed candy canes......and then today I saw this posting from Hostess With The Mostess. Looks like next week's holiday treats will be these candy cane cake pops!


Click here for step by step DIY instructions to make your own candy cane cake pops!

Friday, December 3, 2010

Creatively Incorporating Herbs

I came across this wedding on the always fabulous Style Me Pretty blog, and I loved the creative use of herbs in this wedding! I've seen the use of herbs in bouquets, which I always love.....but I was amazed by the "DIY" station of herbs for the guests to fill their own tossing cones. What a super creative idea! It didn't end there....each herb was accompanied by a sign stating the meaning behind it. (Basil-Good Wishes, Rosemary-Loyalty, Mint-Virtue, etc...) I'm really gushing here! Can't wait for one of my weddings next year to embrace this idea! See the entire post and more photos at Style Me Pretty.


Thursday, December 2, 2010

Cocktail Hour "Jelly Shots"

One of my favorite things is an amazing and unique cocktail hour. Anyone can serve champagne or mixed drinks for an hour, but I love to shake it up a bit! These little "Jelly Shots" are the perfect addition! They're yummy, eye-catching and will definitely stand out to your guests. I always say a great event is all in the small details, and this is a perfect example of that!

Now, don't assume these are your typical sorority house jell-o shots....these little guys are fancy! You can work with your caterer, venue or wedding planner to create these for your wedding. Or, if your event is at a venue that allows you to bring in your own liquor, this would be a great DIY project for DIY brides! We've shown some great examples below from the Jelly Shot Test Kitchen blog. Check them out for even more great jelly shot ideas!

Blackberry Cosmo Jelly Shot (purple), Classic Cosmo Jelly Shot (pink), and Pear Cosmo Jelly Shot (white),
garnished with a paper-thin slice of raw cranberry and a little lime zest.

 Mimosa Jelly Shots, cut with an oval cookie cutter and skewered with edible flower petals.

Pineapple Brandy Fix Jelly Shot, a tasty little pineapple-topped bite...

Rainbow Cherry Jigglers, ready to party!

 Watermelon Basil Martini Jelly Shot, skewered and ready for noshing!

White Wine Sangria Jelly Shot, a most amusing amuse-bouche.

Tuesday, November 30, 2010

WWC's Lukemia Lymphoma Benefit

A few weeks ago we had the pleasure of attending a benefit dinner for the Leukemia & Lymphoma Society that was held at the Rustic Hills Country Club in Medina and organized by a networking group I'm a member of, Working Women Connection. Being that cancer has personally touched my family in more ways than one, I'm always more than willing to participate in cancer benefits. The theme of the evening was "An Evening to Remember", and it was definitely that....

 With almost 100 guests, the event raised over $3,000 for the Leukemia Lymphoma Society!

There were balloons with raffle tickets inside, and every balloon won a prize! The fun part was popping it go get your prize!

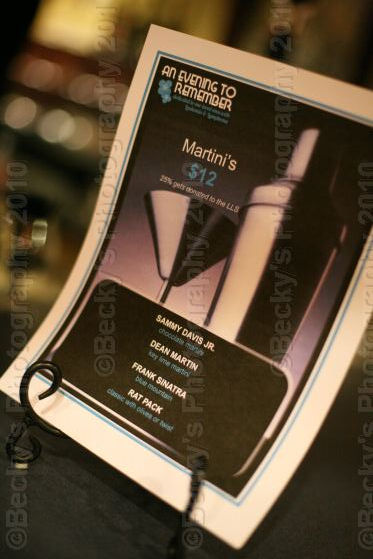
The bar served themed martinis called Sammy Davis Jr., Dean Martin, Frank Sinatra and Rat Pack.

Raffle tickets were sold, and the winning tickets won these hat boxes filled with goodies donated by the Working Women Connection chapters. 

This hat box was donated by our chapter (Avon Lake) and won the prize for Most Beautiful!

There was a wonderful Frank Sinatra impersonator on hand for entertainment.

Each guest got to take home a packet of Forget Me Not seeds as a favor.

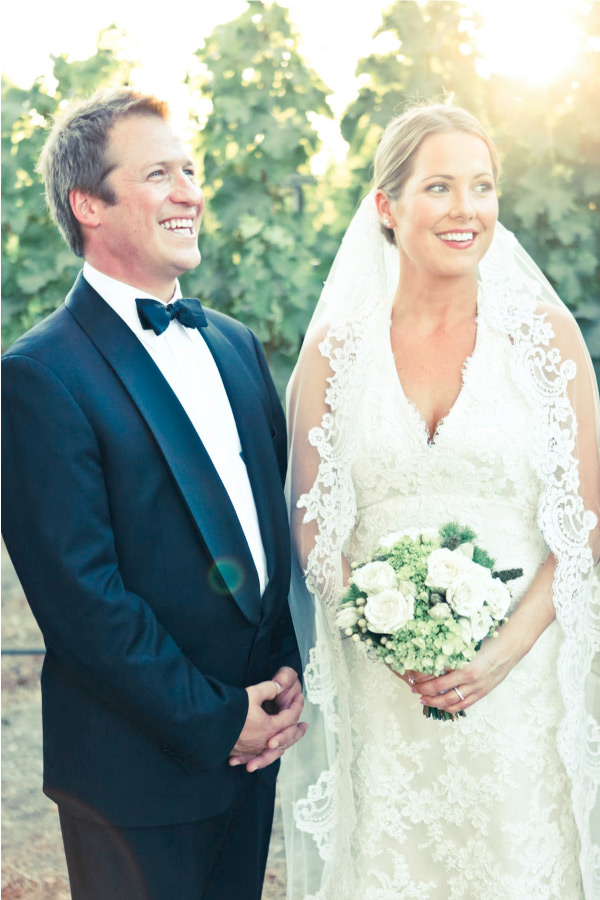
Me and my husband, Jamie, at the LLS event.

Jessica (Marketing Director), Bonnie (Co-Founder) and Tami (Co-Founder) of Working Women Connection.

Photographs by WWC member, Becky Workman of Becky's Photography.

Wednesday, November 24, 2010

Giving Thanks...

I'm sitting here in the early morning hours while my husband is still sleeping....just catching up on some blog posting and plans for upcoming events. Tomorrow is Thanksgiving, and I was starting to get sad that I'm not going home this year to see my mom, grandma and brother. I have too much work and too many appointments to take the time off this year.

I've learned that when I feel down, I need to step back and look at the big picture. Looking back over the year, I realize just how much I have to be thankful for....


I'm thankful to have my Mom. She was diagnosed with endometrial cancer in October of 2008, and I took several months off from my business to go home to Texas to stay with her. Her cancer was in an advanced stage and she needed surgery to remove the tumors, followed by months of painful radiation and chemotherapy. For a long time I wasn't sure what was going to happen....but just last month, she had her 2 year CT scan and is still cancer free. She is now officially in remission, and that's the #1 thing I'm thankful for this year. Love you Mom!

I'm thankful for my husband, Jamie. He is my best friend, my business partner, my rock. I have never felt more at ease with anyone in my entire life, and I still get giddy-excited like a school girl when I think about our future together. He's right next to me working hard to grow my business....and he's even become quite the event decorator. He can tie a chair sash with the best of 'em! :) He really is the love of my life, and I'm thankful for all the wrong paths I took in the past that ended up leading me to him.

I'm thankful for my intern (and soon to be planner/coordinator), Whitney. She has made great strides in helping with our events and marketing since she came aboard. My business has grown and was beginning to become overwhelming, and she walked into the picture at exactly the right time. I can't wait to make her a permanent part of the team and watch her grow into an amazing event planner!

I'm thankful for Stacey, my new business partner. She has given me the opportunity to open a second studio, which has been a dream of mine since I began this business. She is a strong, goal-oriented woman, and together we'll be a powerhouse team that can't be stopped! We're helping to inspire each other and grow each others businesses, and the future for our new studio looks amazing!

I'm thankful for the wonderful business women (and friends) I've met at Working Women Connection; Angela, Becky, Michelle, Chris, Shelley, Stacey, Mary, Maya and Hillary. Every Wednesday these ladies inspire me personally and professionally. They have kept my spirits up this year and reminded me on a weekly basis how important friendships are. I'm blessed to be a part of such a wonderful and intelligent group of women!

I'm thankful that my business is becoming more and more successful. We won TheKnot's pick for Best Wedding Planner this year, and we're growing in so many directions now. I'm thankful that my business mind has been stimulated this year and the ideas just don't stop flowing.... every week I think of a new project to work on, and I hope the ideas keep coming!

I'm thankful for my clients. This year (and next year) we're working with the most enjoyable people! Having great clients makes my job that much more enjoyable, and I appreciate the fact that I have the best clients in the world right now!

I have so many things to be thankful for....my home, my family, my business....there are days where I feel down and like the world is out to get me. All I have to do is stop and think about all I have to be thankful for, and I realize the world has given me more gifts than I deserve.

Happy Thanksgiving everyone! Be sure to take a moment to think about all you have to be thankful for....while it's still around to appreciate. :)

Thanksgiving Centerpiece Floral Class

Our floral class on November 21st was a blast! The ladies did an amazing job on their arrangements and learned lots of tips on the basics of flower arranging. We used a pumpkin basket as the vase, and we filled it with fall colored blooms and feathers. We even did a quick "Bow Making: 101" class to learn how to make bows for the sides of the pumpkin basket. The finished product was beautiful! Can't wait until next month when we do the Holiday Evergreen Centerpiece floral class!


Related Posts Plugin for WordPress, Blogger...